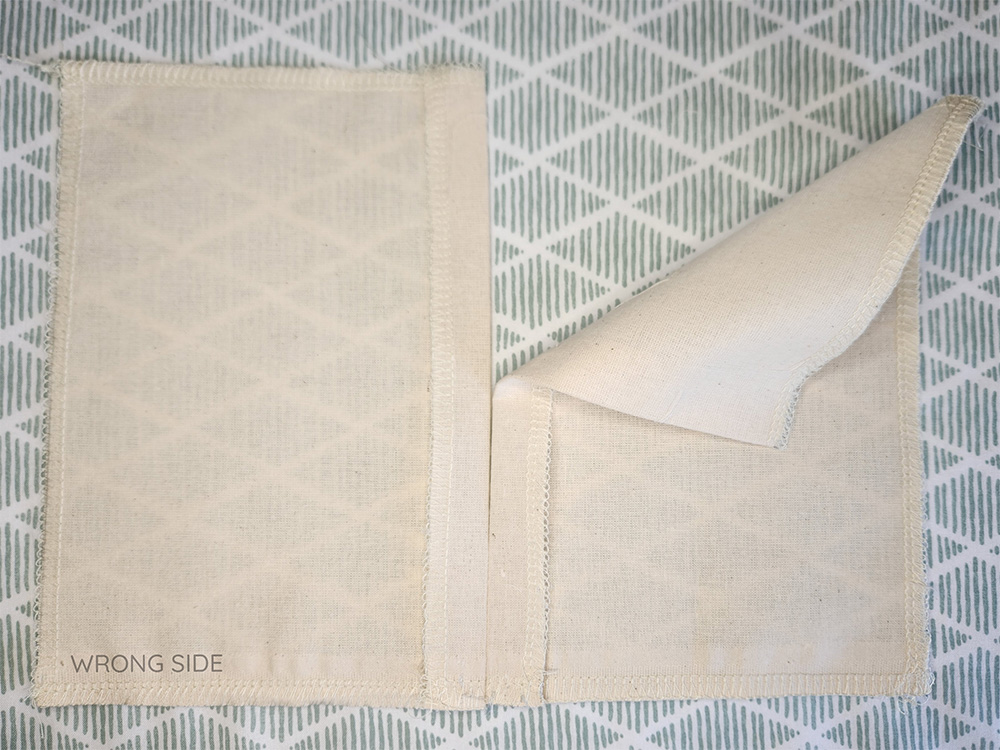
Add a notch on the edge of the seam allowance where the bottom of your zip will finish (zip notch). Then sew the seam up until the zip notch, leaving the remaining length of the seam open for the zip to be attached. In most cases this seam is 1.5cm (3/5 in) wide. Overlock the each edge.
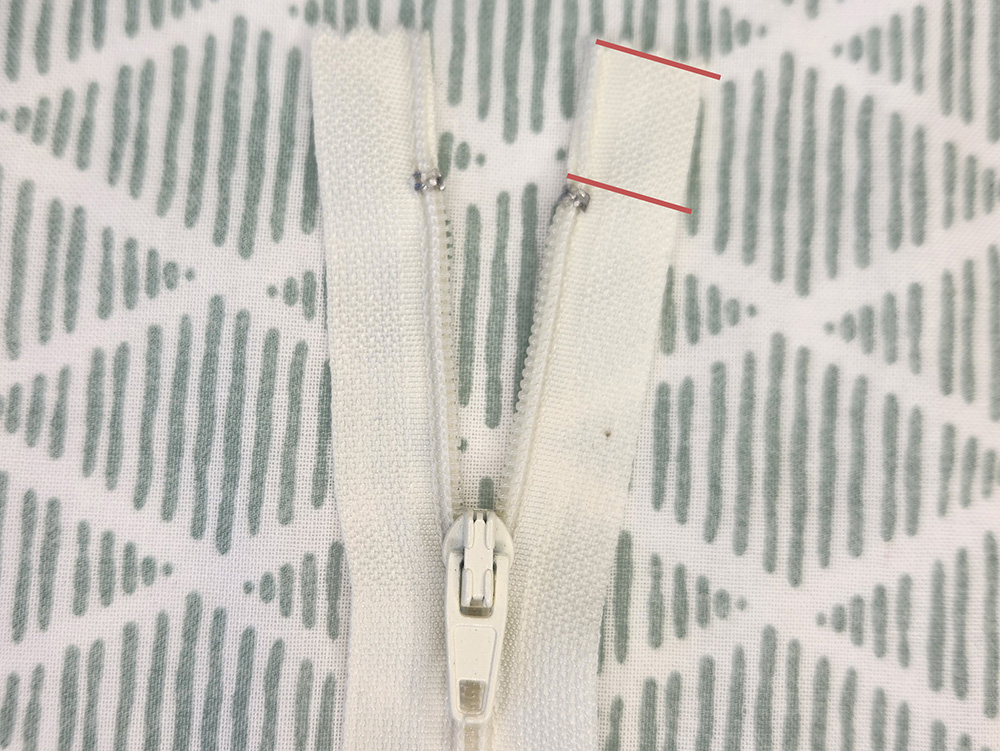
Note: The zip will have tape the extends further then the teeth this is to give you a bit of room for seam allowance, if your zippers end is being sewn into something else.
Press the seam open, starting at the bottom where you have sewn the seam, up and past the zip notch to the top of the seam.
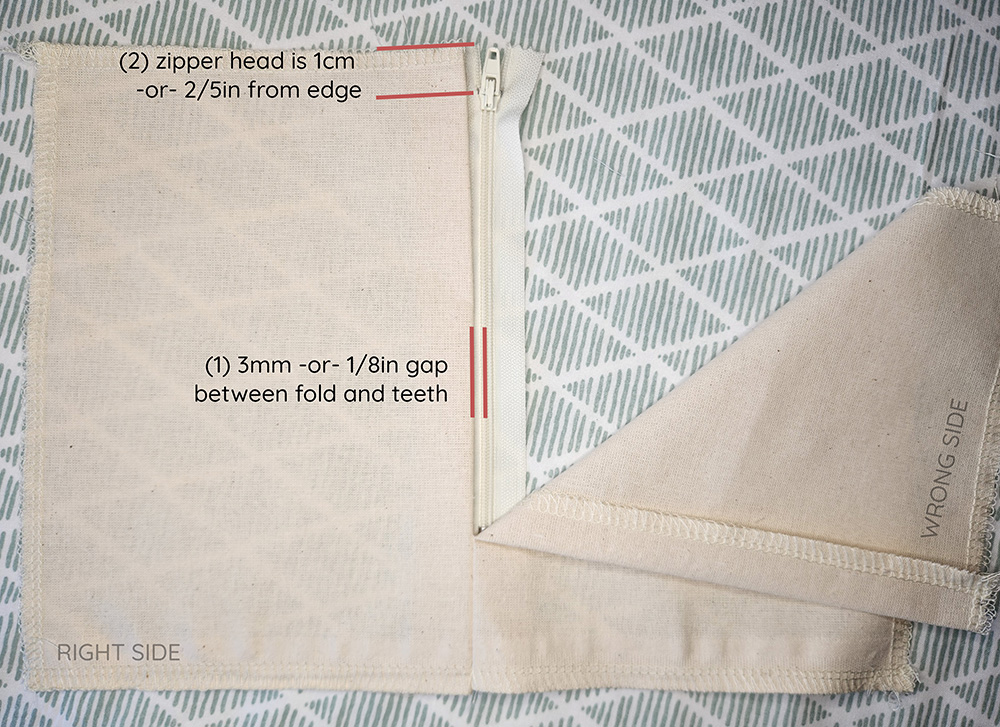
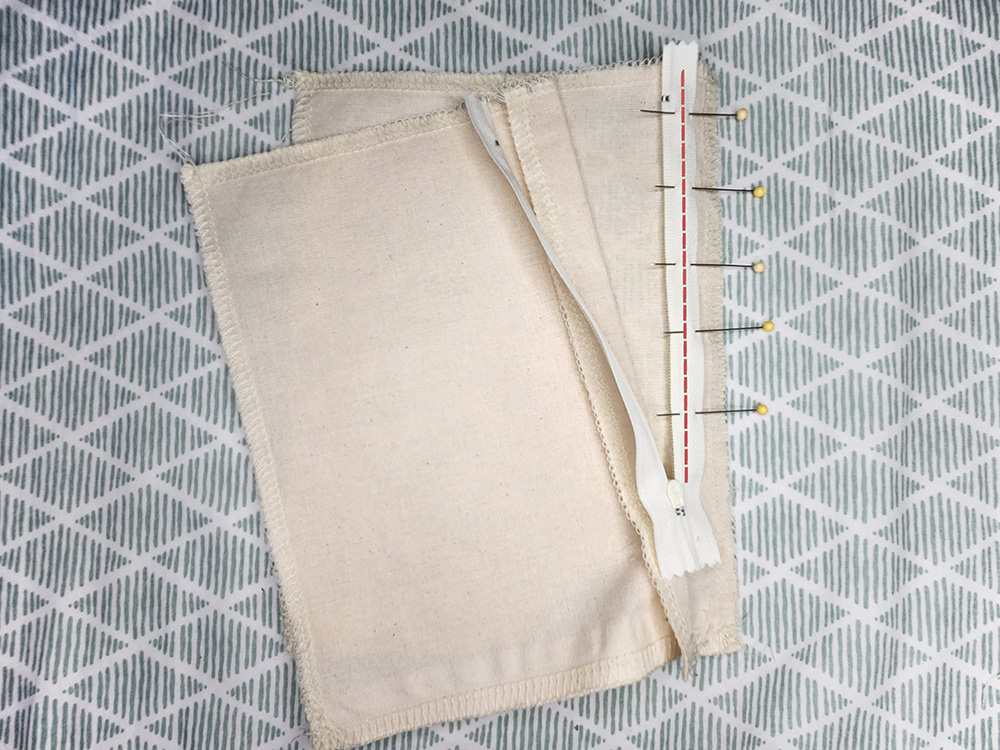
(1) Align the left side of your zipper teeth with the folded edge of the fabric (along the seam). There should be a small gap between the zipper teeth and the fabric edge approx 3mm (1/8 in) is fine. This will help keep the zipper from getting caught on the fabric.
(2) Also ensure that the top of the zip is aligned the edge of your fabric at the top of the seam, or align it so that the zipper head is 1cm (2/5 in) (or whatever your seam allowance is) from the edge of the fabric.
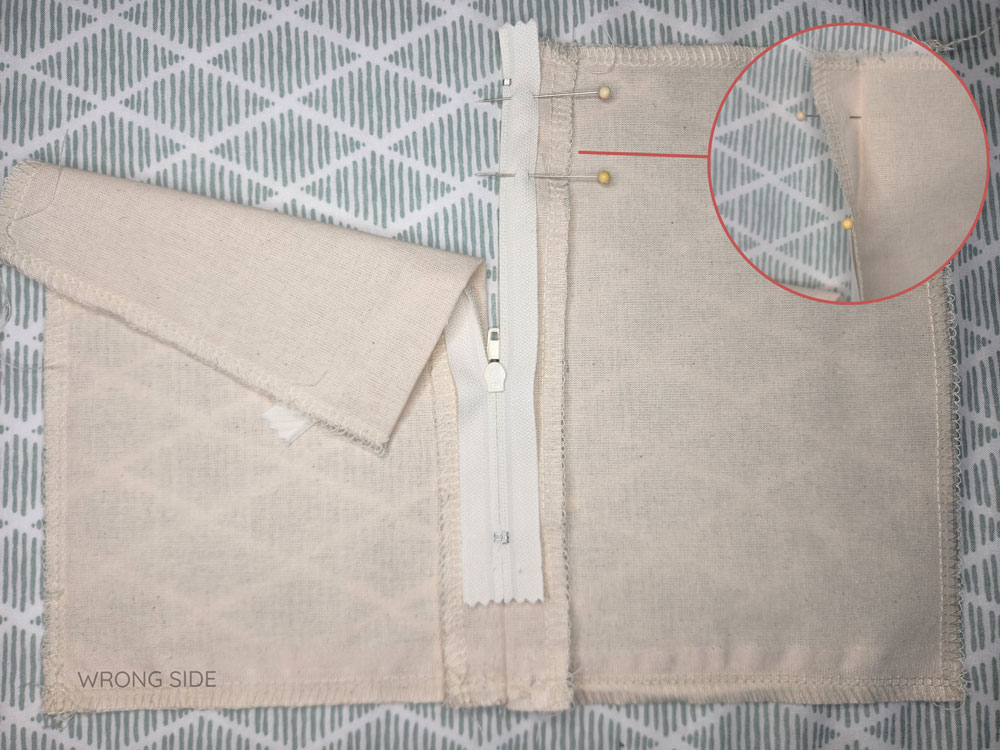
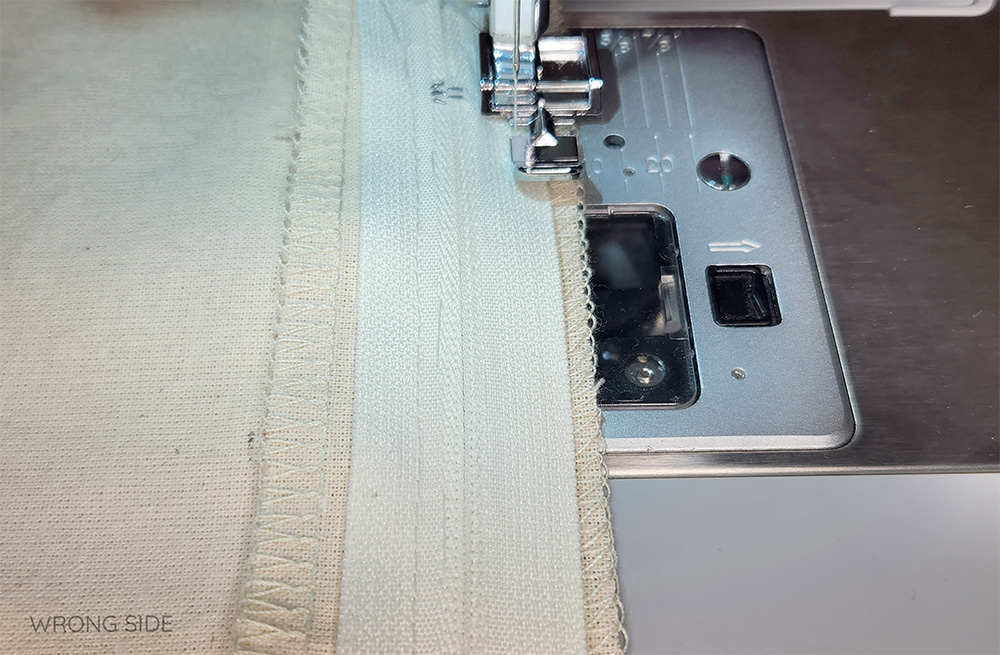
Pin the zipper to the fabric along this edge ensuring that you are pinning on the seam allowance only; this should only be a single layer of fabric.
In the photo above I am pinning the zip onto the panel that will cover the wearer’s left side.
Basting
Alternatively you can baste. Basting is a fantastic technique if you have the time. Basting will help keep things aligned and predictable during each step of the process.
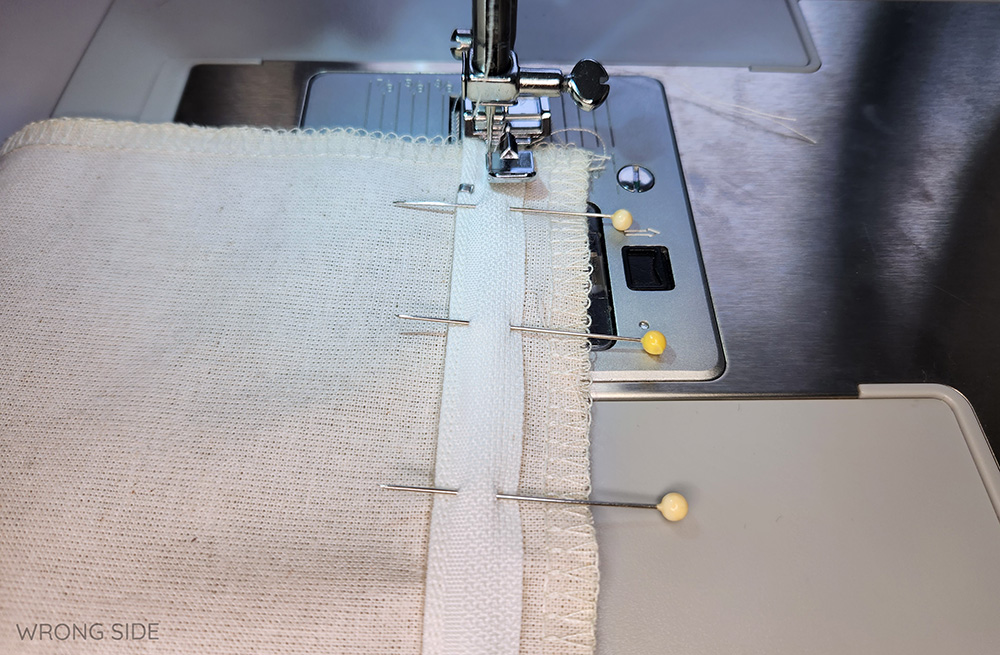
Then sew along the zipper tape attaching the zip to the seam allowance only. start on the top edge of the opening with the zipper opened and sew down towards the end of the zip. At the 1/2 way point you may need to close the zipper so that the zip pull does not interfere and push against your presser foot resulting in a crooked stitch line.
Moving the Zip Puller:
“anchor” the needle by sinking the machine needle into the fabric then lift the presser foot.
Move your zip puller back up to the top, passing the presser foot.
Lower the presser foot and continue sewing.
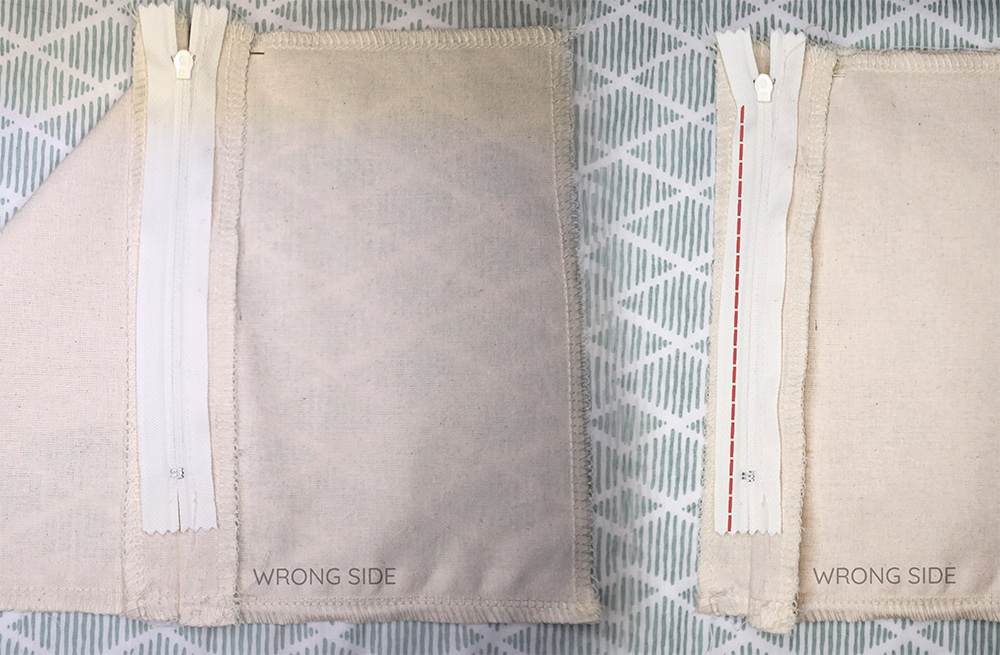
To secure the zip set up your zipper foot with the needle coming down on the right side of the foot. Starting at the top of your zipper, sew along the folded fabric edge ensuring you catch both the zip tape and fabric. Sew down along the zip tape until you pass the zip stopper by ~6mm (1/4 in).

Basting the zip: I like to loosely baste the zip closed to ensure that the edges of the main fabric are secured so that they meet neatly.
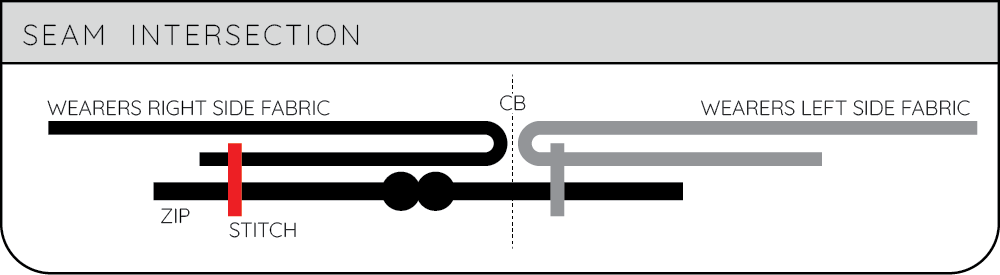
With the wearer’s left side of the zip attached and fabric secured, turn over to the wrong side. Your right side zip tape should naturally sit were it should be sewn in. Fold the main fabric away from the seam allowance and then sew this side of the zip again starting at the top of your zipper like what has been done previously on the right side.
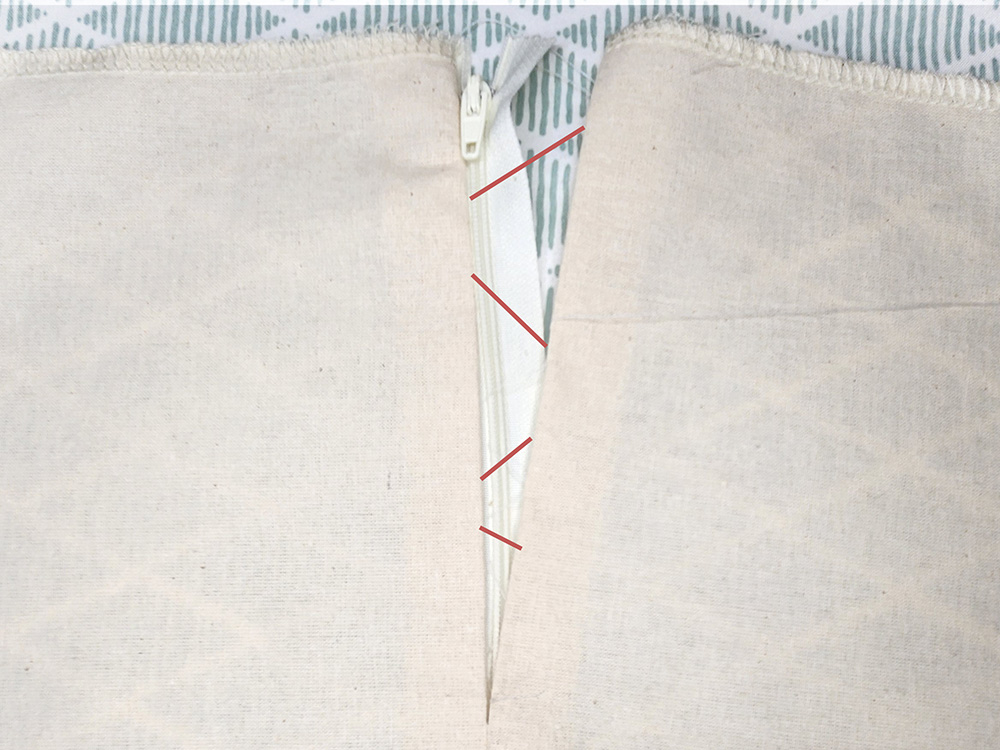
Using tailors chalk you can mark out the lapped zip stitch line on the fabric’s right side. Ensure that you mark the stitch line on the wearers right side. You can consider basting along this line to ensure that you will catch all three layers (fabric top side, zip tape, seam allowance).
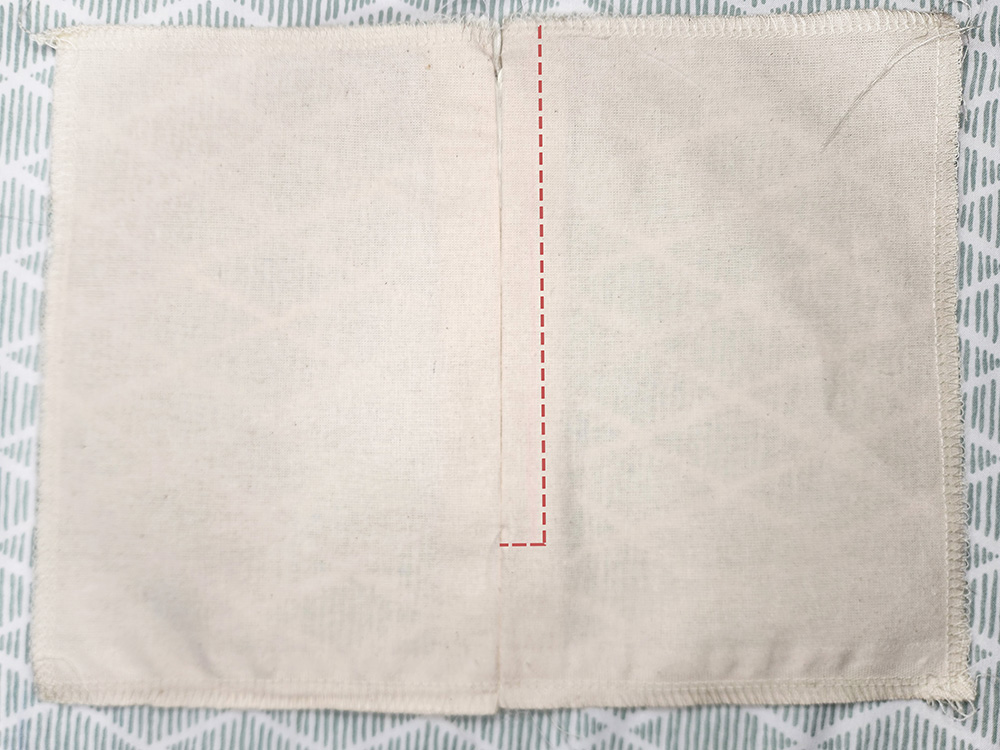
Starting at the bottom of the zip stitch perpendicular to the CB seam ~6mm (1/4 in) across, or however wide you want the lapped zip which will depend on how big your zip teeth are. Be mindful that they zip stopper is in this area – stitch slowly over the teeth to avoid breaking a needle. Most often, the best way to do this is by advancing the machine by hand.
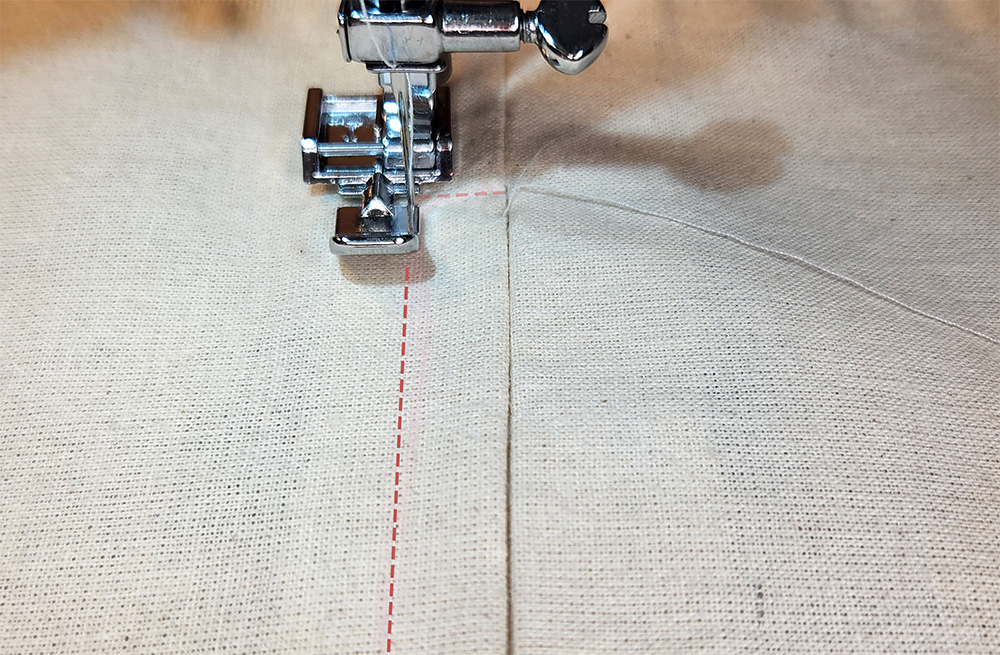
Once stitched across, anchor the needle and pivot 90° to sew up along the zip. Stitch up until you reach the end of your zipper opening.
When you’re finished, give your zipper a light press (no hot iron on the teeth, they might melt!)